


So, after owning the car for 2 weeks, my first mod has been completed. Ordered the mount from MPS Garage on Monday and received in on Wednesday.
I chose the 60duro over the 75 as I didnt want to increase NVH. I bought the mount cause I thought the stock mount was stuffed as it felt like the engine was bucking. Pulled the stock one out and it was in perfect condition. It just goes to show (for me anyway) how soft the stock one is.
First impressions
This is what it should have felt from stock. The engine actually moves with the chassis in harmony and feels secured, improved greatly compared to the sloppy, doughy feeling it had before. The engine revs 'smoother' and you will feel the engine rev. Gear changes are very clear and crisp. I had trouble shifting between 2 and 3 (down or up) even when rev matching downshift, the engine would jerk. This is all alleviated now.
Vibrations. There is a little bit of vibes at idle and as you take off. The vibes do increase with the a/c on at idle. But as everyone has mentioned these will settle down as the mount wears in. I will provide another update probably in 5000km to see how its settled. As such I won't comment on this aspect into too much detail just yet.
Second impressions - Important See Third Impressions below
Ok, so I've done a few KM's since the install and here's what I have found. Nothing has really changed since my first impressions above, but more confirming this is what it feels like after it's settled.
- Idle without A/C minimal vibes
- Idle with A/C small amount of vibes, most noticible on takeoff
- Accelerating RPM below 3.5k small vibes
- Accelerating RPM past 3.5k moderate vibes, engine noise increases with RPM. Can get quite loud past 5k esp when decelerating.
If your susceptible to vibrations or want NO vibrations, then dont get this. The vibrations are not bad at all, they dont rattle anything. They were nothing like my friends solid mounts... Also the engine noise resonates a lot more inconjunction with the vibes. If you want absolute tranquility, then dont get this.
If you can handle a little bit of elevated NVH, then its well worth the investment for the performance. However, I do still get axel tramp with this installed. I'm also getting a creaking/knocking sound which I can't pinpoint at this stage. Might need to tighten the bolts a bit more.
Third impressions
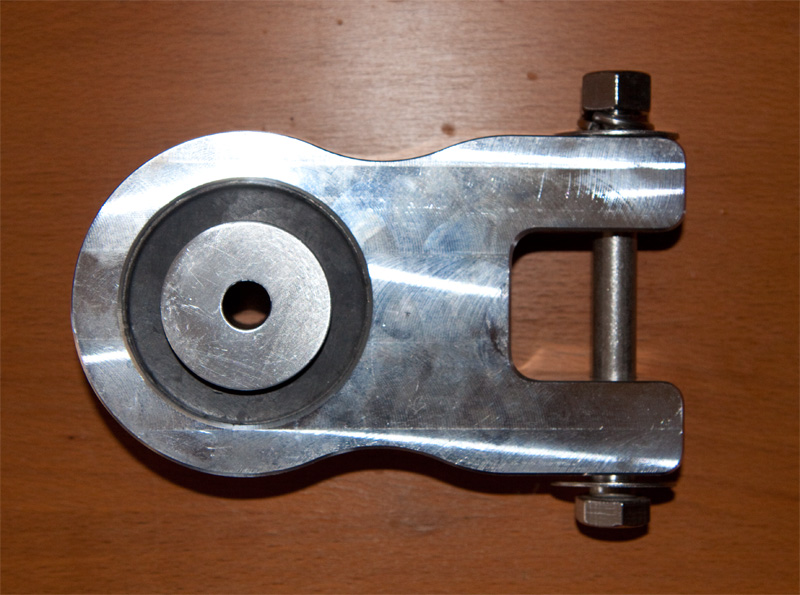
So the creaking sound I kept getting from what I hoped was the engine was found to be true. I loosened all the bolts (adapter plate and engine mount) to re tighten them however, this time armed with a good torque wrench. I torqued the adapter plate bolts first to 110nm and then tightened the bolt 1 (pic below) then bolt 2 of the engine mount, both to 110nm. The sequencing of tightening is outlined in the service manual which I actually didn't have nor used before (not too sure how I tightened them last time).
The difference? No more creaks!!! what else, the vibes has reduced even further as the mount seems to be doing its job more efficiently and as intended. The solid feeling has not changed either. Before the bolts were over tightened and hence the bolts themselfs were transmitting the vibes more than they should
So to update my impressions:
- Idle without A/C very minimal vibes, almost stock
- Idle with A/C minimal amount of vibes, most noticible on takeoff
- Accelerating RPM below 3.5k minimal vibes
- Accelerating RPM past 3.5k small amount of vibes, engine noise increases with RPM. Can get moderately loud past 5.5k esp when decelerating.
After re-torqueing the bolts, daily driving almost feels like stock. You notice the vibes mostly during spirited driving only
Rough install guide
Difficulty: Easy
Time: about 45mins-1hr if all goes smoothly
Tools needed: jack & car stands or ramps, wheel chocks, 17 & 19mm sockets, ratchet, 19mm spanner or shifter, breaker bar, TORQUE WRENCH and lastly beer
All done. It took me about a 1hr as I tried to wriggle the mount out without taking the adapter plate off cause I couldnt crack the bolts. In the end it was nessessary to get that plate off and was a sigh of relief when the bolts cracked. Nearly rounded one of them in the process....
- Jack the car up or as I did buy some ramps. If using a jack, use car stands as well. Chock up the rear wheels.
- Undo bolts 3,4 & 5 (19mm) on the adapter plate. These were on VERY tight and took a while to get them undone. breaker bar essential
- Undo bolts 1 & 2 (17mm). Once all 5 bolts are undone, the engine mount and the adapter plate will come out easily
- When installed, the various spacers, washers etc will look like the 2nd picture below. CPE instructed to have their logo facing downwards (facing the ground).
- Loosely install the mount and adapter plate with all bolts finger tight. You will most likely be unable to put bolt 1 back in as its not aligned. As shown in the 1st picture, I tightened bolt 5 to be able to push the engine forward with the ratchet. The engine moves quite easily.
- Bolt 2 which was 17mm for the stock mount is now 19mm.
- Tighten in the following order! Tighten the adapter plate bolts first to about approx 110nm
- Tighten bolt 1 to approx 110nm
- Tighten bolt 2 to approx 110nm
The torque to the bolts is the upper range of the specified torque figures outlined in the service manual, and is what works for me. As mentioned in my third impressions, over tightening them may cause issues
Save yourself the trouble and put all your effort in removing the adapter plate
Any questions feel free to ask.


 Reply With Quote


